Planning a trip to Torres del Paine can feel a bit overwhelming at first. And for good reason. It’s not the kind of place you just show up to. The park is remote, the weather is unpredictable, and if you want to stay inside the park, especially along the popular W trek, you’ll need to book months ahead.
But here’s the thing: it’s worth every bit of planning.
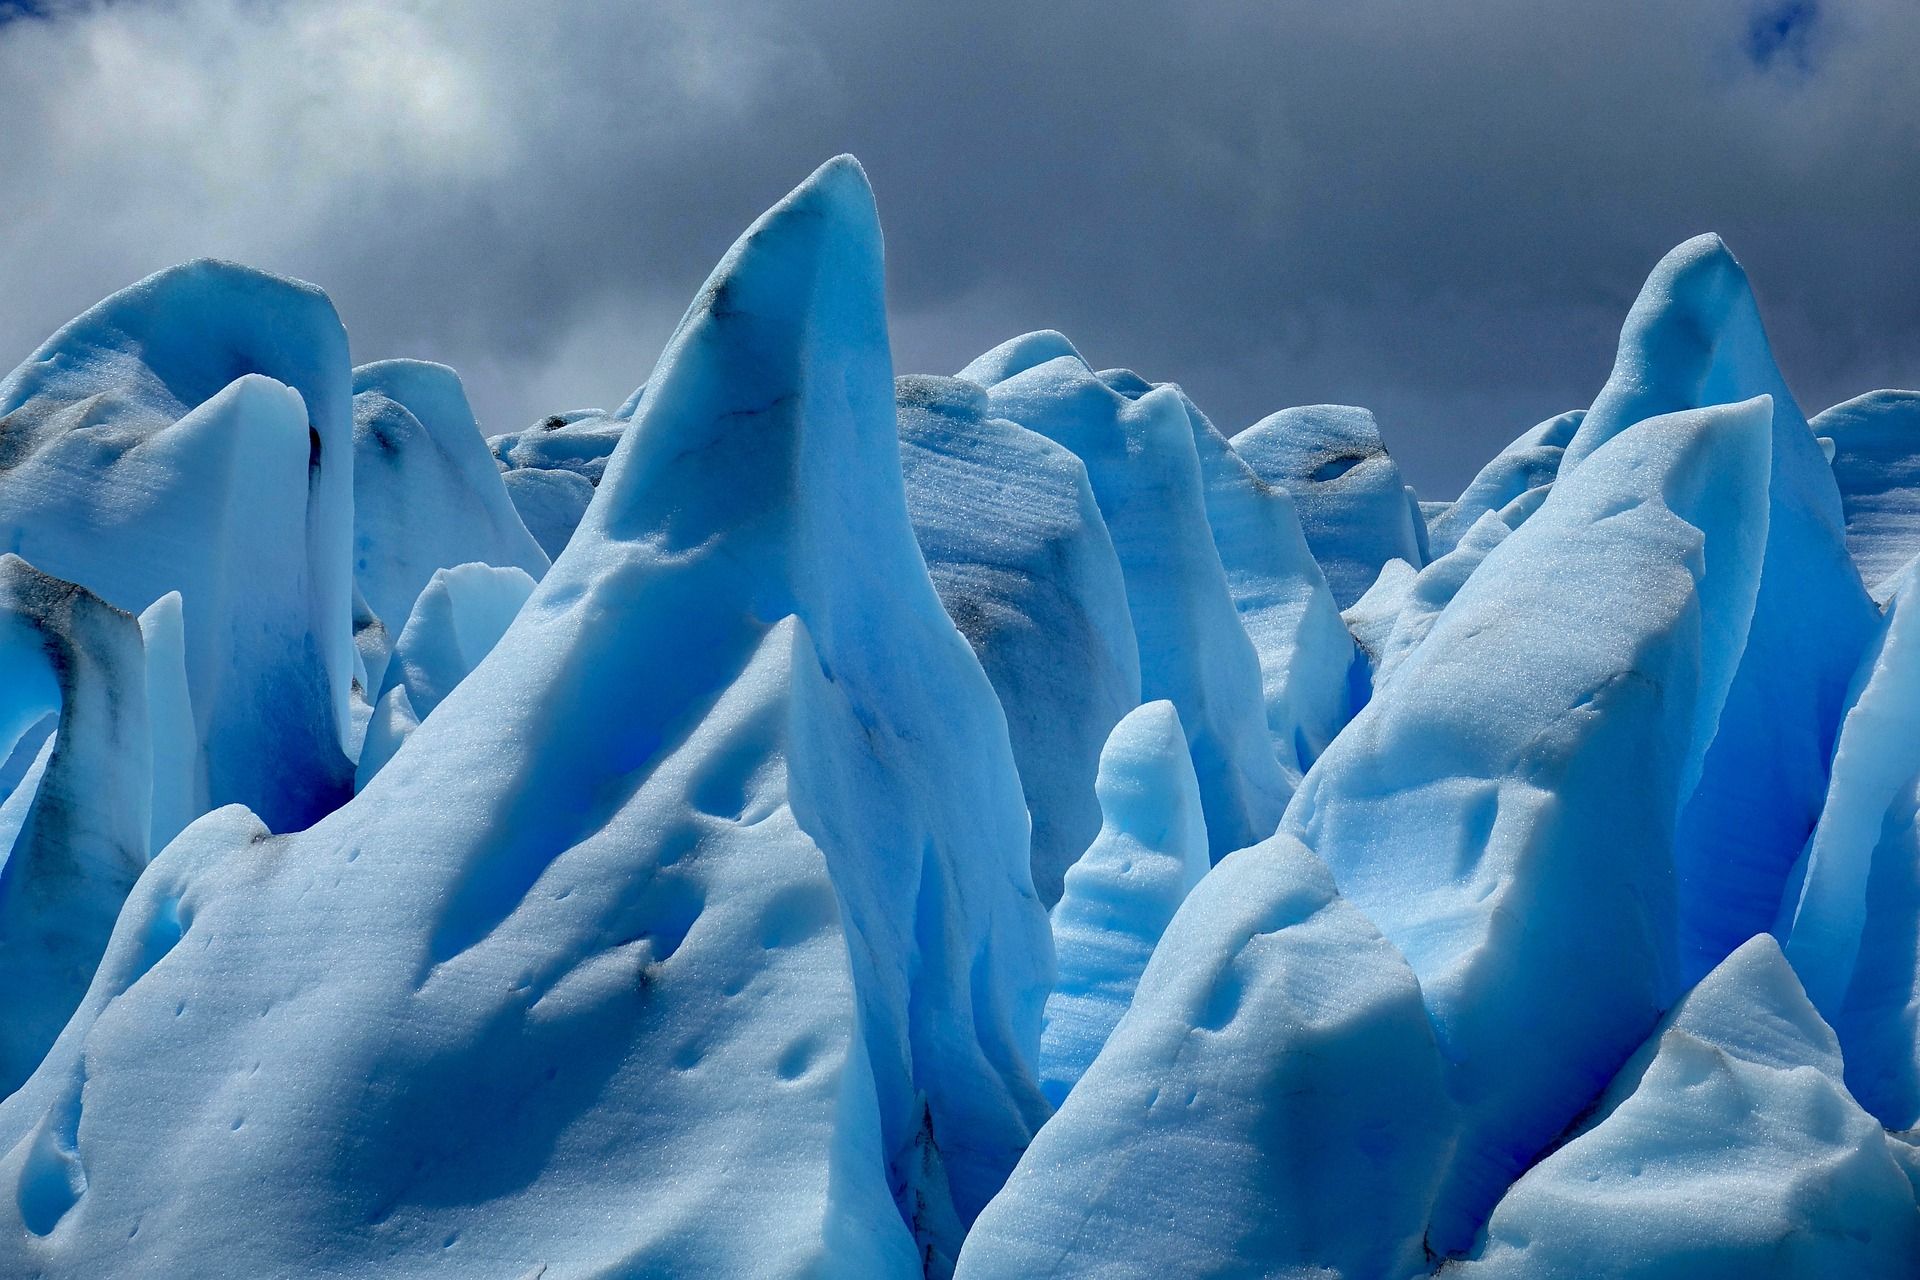
This place is wild. Massive granite towers, glaciers calving into ice-blue lakes, and trails that wind through scenery that honestly doesn’t look real. You can go for a day or spend over a week hiking the full O Trek. Either way, the experience sticks with you.
This guide pulls together everything you’ll need to sort out before you go: how to get there, when to book, what to pack, how to choose a trek, and what to expect once you’re on the trail. It’s detailed because it has to be. There’s a lot that doesn’t work like a “normal” trip.
If Torres del Paine is on your list, this is where you start.
Table of contents
When to visit Torres del Paine
- October to Mid-November: Early season (spring)
- Mid-November to February: High season (late spring to summer)
- March to April: Late season (autumn)
- May to September: Off season (winter)
W Trek or O Trek? How to choose the right route
How to get to Torres del Paine
How to book Torres del Paine: Timing and tips
- As soon as bookings open (Essential for peak season)
- 3-4 months before your trip
- 1-2 months before your trip
- Last-minute trips
Torres del Paine accommodation options
- Torres del Paine park entrance fee
- Accommodation costs
- Gear and meals
- Getting there
- What it might cost per day
What to pack for Torres del Paine (W or O Trek)
- Packing essentials
- Things you might not think of (but will be glad you brought)
- Torres del Paine packing list
Park rules and trail etiquette
When to visit Torres del Paine
The best time to visit Torres del Paine is during the park’s main trekking season, which runs from October to April. That’s spring through early autumn in Patagonia — the months when the trails are open, the refugios are running, and the weather is (relatively) cooperative.
But here’s the thing: Patagonia’s weather has a mind of its own. Even in summer, you can get sunshine, sideways rain, and gale-force wind — all in a single afternoon. So when people ask “what’s the best time to go?”, the better question is: “what kind of experience are you after?”
October to Mid-November: Early season (spring)
- The park is just waking up, trails start to open, flowers bloom, and there are far fewer people.
- Snow can still be present on higher sections of the park.
- Some trails might remain closed depending on conditions.
- The O Trek usually opens on November 1st, but this depends on weather and trail safety.
- The W Trek may open as early as September, but a certified guide may be required for certain sections, sometimes all the way into October. This can mean extra costs and no refunds from your accommodation provider.
- Weather is unpredictable: wind, rain, sunshine, and even snow are all possible in a single day.
Mid-November to February: High season (late spring to summer)
- This is when the park is in full swing. All trails are typically open, services are running at full capacity, and the weather — while still wild — is at its best.
- Long daylight hours (up to 17 hours) make it easier to cover long trekking days.
- It’s also the busiest time, especially around Christmas and New Year. Book your campsites or refugios well in advance, ideally 5–6 months ahead if you want decent availability on the W or O.
- Expect warmer temperatures, though “warm” in Patagonia still means layering up — daytime highs average around 15–20°C.
March to April: Late season (autumn)
- The crowds thin out, the light gets softer, and the lenga forests turn shades of gold and red. It’s arguably one of the most beautiful times to be in the park.
- The weather is cooler, especially at night, but often more stable than in spring.
- The O Trek usually closes at the end of March. After that, you won’t be able to complete the full loop, even if you’re well-prepared. Some campsites and refugios also start closing around this time, so availability becomes more limited.
- In April, CONAF may decide to close additional trails or require hikers to be accompanied by a certified guide, depending on the weather. This can mean unexpected changes and extra costs, and just like in early spring, these restrictions don’t qualify for a refund from your accommodation provider.
May to September: Off season (winter)
- Most trails are closed or only accessible with a certified guide.
- Snow and ice are common. Most of the refugios are closed.
- Not recommended unless you're experienced and traveling with a guide.
W Trek or O Trek? How to choose the right route
Once you’ve narrowed down when you want to visit, the next step is deciding which trek is right for you.
Torres del Paine isn’t a single trail. It’s a network of routes with different lengths, levels of difficulty, and types of experience. Whether you want a five-day highlight tour or a full loop through remote backcountry, there’s something here for you.
The W Trek
Distance: ~80 km
Time: 3–5 days
Type: Point-to-point
Route highlights: Grey Glacier, French Valley, The Base Torres
This is the most popular trek in the park, and for good reason. It hits many of the park’s most iconic views in a manageable time frame. You can hike it from west to east or east to west, and stay in campsites or refugios (or mix both).
Good for: Hikers of all levels looking for a classic Torres del Paine experience — from first-timers to seasoned trekkers with limited time.
Read the full W Trek guide ⬇️
The O Trek
Distance: ~136 km
Time: 7–9 days
Type: Full loop
Includes: Entire W Trek, plus backcountry section
The O is a full circuit around the Paine Massif. It includes everything on the W, but adds several days of more remote, less crowded terrain — including the dramatic John Garner Pass and the backside of the park.
Good for: Experienced trekkers, those who want the full experience, fewer crowds
Read the full O Trek guide ⬇️
Day hikes
If you’re short on time (or just not into long hikes), you can still visit the park. Here are some ideas:
- Base Torres - The iconic view of the towers. Tough but doable in a day.
- Lago Grey and Glacier viewpoint - Short, scenic walk from the Paine Grande area.
- French Valley - Reachable if you time the catamaran right.
Good for: Day-trippers, casual hikers, those staying outside the park
Torres del Paine difficulty: W Trek vs. O Trek

How to get to Torres del Paine
Most people get to Torres del Paine through Puerto Natales, a small town about two hours from the park. To get there, you’ll usually fly into Punta Arenas (Chile) or El Calafate (Argentina), then continue overland by bus or rental car.
From Puerto Natales, regular buses run to key points near the park, including the main entrance at Laguna Amarga and the Pudeto bus stop, where you can catch the catamaran to Paine Grande if you're starting the W trek from the west.
Where you get off depends on your itinerary, so double-check your route before booking transportation.
We’ve put together a full guide with all the details — flights, overland travel, border crossings, and local tips.
Read the full guide on how to get there ⬇️
How to book Torres del Paine: Timing and tips
This is one of the most important parts of planning your trip right. Torres del Paine might be remote, but it’s also one of the most popular trekking destinations in South America — and things book out quickly.
If you want to hike the W or O trek, you’ll need confirmed reservations for every night before you hit the trail. That said, not everything disappears immediately — and there are a few windows where last-minute trips are possible, especially outside of peak season.
Here’s how far in advance you should start locking things in and what to take care of at each stage.
As soon as bookings open (Essential for peak season)
If you're planning to visit between mid-December and February, you should book your campsites and refugios as soon as the booking season opens. Some dates sell out within days. And it’s not just about dates — the most affordable campsites and dormitory beds are usually the first to go. If you're on a budget, waiting even a few days can leave you with only the most expensive options (or no options at all).
The exact opening dates vary slightly each year depending on the providers (Vertice Patagonia, Las Torres Patagonia), but they typically open sometime between April and June.
3-4 months before your trip
This is your last good window to review your full itinerary and make any changes.
If you want to adjust your route, switch nights, or cancel some bookings to lower your total cost, now is the time to do it. After this point, most cancellation policies become stricter, and refunds are limited or unavailable.
- Finalize your transportation: buses, Pudeto catamaran
- Reserve any gear rentals and meals
- Check the entry requirements for Chile
- This is also a good time to purchase travel insurance
Doing a final check now can save you money and avoid stress later.
1-2 months before your trip
At this stage, you're mostly locking things in. There’s not much flexibility left, so double-check everything before your trip.
- Buy your park entrance ticket. It’s required for all visitors and must be shown at the park entrance.
- Book your transportation to and from the park — buses, the Pudeto catamaran if you haven’t already.
- Finalize any gear rentals and meal reservations.
- Review your full itinerary to make sure all bookings match.
What about last-minute trip?
If you're traveling in October, March, or April, it's often possible to plan your trip with just a few weeks’ notice. Many people book early and cancel later so spots tend to open up again closer to the date. It's worth checking availability even if you think you're late.
Torres del Paine accommodation options
If you plan to hike the W or O trek, you’ll need to reserve accommodation for every night you’re in the park. No exceptions. You can choose between campsites (with your own gear or rented equipment) or refugios, which offer shared rooms with bunk beds.
The booking system can be confusing at first: two different companies operate accommodation in different parts of the park — Las Torres Patagonia and Vertice Patagonia — and each has its own website, policies, and cancellation rules.
That’s where we come in. On TorresHike.com, you can check availability and book all your nights in one place, no matter which company operates them. No switching between platforms, no guesswork.
Torres del Paine campsites
Camping is the most affordable way to experience Torres del Paine — and sometimes the only option.
You can either:
- Bring your own gear and book just the camping spot, or
- Book tents, sleeping mats, and sleeping bags individually
- Reserve a full camping package (tent, mat, sleeping bag) that will be set up for you.
However, it’s important to know that not all campsites offer space for personal tents. At certain locations, the number of spots for self-supported campers is limited. In those cases, you’ll be required to book the full rental package, even if you planned to bring your own gear.
Campsites have shared bathrooms (usually with hot water) and designated cooking areas. However, these cooking areas are not equipped with stoves or utensils. They’re simply spaces where you can prepare your own meals using your own gear.
Torres del Paine refugios
Refugios are simple mountain lodges with shared dorm-style rooms located along the W and O trekking routes.
Some refugios offer fully made bunk beds with sheets, blankets, and pillows. Others give you the option to choose between a basic bed (just a mattress) or a fully prepared bed for an extra fee. Be sure to check the details when booking. What’s included can vary by location.
All refugios have access to hot water showers, though this may be subject to time restrictions or rotating schedules, especially during high season when there are many guests.
Staying in a refugio is a great option if you want to travel light and have a roof over your head after a long day on the trail.
Not sure how to book your trek step by step? We've put together a full guide that walks you through the process — including how to choose your route, and book everything in one place.
Read more about how to book campsites and refugios ⬇️
Cost and budget planning
Torres del Paine isn't a budget destination, but you have options. Some people go full-on backpacker mode — camping, carrying everything, cooking their meals. Others book refugios, rent gear, and go lighter. How much you spend depends on how you balance comfort and effort.
Torres del Paine park entrance fee
You’ll need to buy a park ticket before you go. For international visitors, it’s around $39 to $55 USD, depending on how long you’re staying. Chileans pay less. You should buy the ticket online, and it’s non-refundable and non-transferable.
Accommodation costs
Campsites
If you bring your own gear, some campsites are pretty affordable — anywhere from $12 to $90 USD per night.
If you go with a full rental setup (tent, mat, sleeping bag), expect to pay more — between $100 and $270 USD per night, depending on the site and provider.
Refugios
Some places offer a basic bed — mattress, pillow, and that’s it — for around $43 to $65 USD, but that option isn’t available everywhere.
If you want a fully made bed with sheets and blankets, you’re looking at $105 to $207 USD per night.
Meals aren’t included in these prices. You can add them when you book or bring your own food with you.
Gear and meals
If you don’t have your own camping gear or don’t want to rent at every stop, a good option is to rent a full kit in Puerto Natales and carry it yourself. It’s cheaper than renting piece by piece along the route.
Expect to pay around:
- $5–15 USD per day for things like mats or sleeping bags
- $30–65 USD per meal if you reserve meals in advance
Getting there
- Bus from Puerto Natales to the park: about $15–20 USD one way
- Catamaran from Pudeto to Paine Grande (or Paine Grande - Pudeto): around $30 USD one way
What it might cost per day
It really depends on how you do it. Here's a rough daily estimate once you're in the park:
- Low budget (camping, own gear, no extras): $80–130 USD per day
- Mid-range (refugios or a mix, some rentals): $160–260 USD per day
- Comfortable (refugios, full bedding, full camping packages, no gear carried): $320+ USD per day
What to pack for Torres del Paine (W or O Trek)
Packing for Torres del Paine is all about being ready for anything. The weather changes constantly — sun, wind, rain, even snow — sometimes all in one day. So whether you're camping or staying in refugios, the basics are the same: stay dry, stay warm, and don’t overpack.
Packing essentials
- Waterproof layers — jacket and pants that can handle real wind and rain
- Worn-in hiking boots — waterproof if possible
- Thermal base layers and warm midlayers — fleece, down, etc.
- Sun protection — sunglasses, hat, sunscreen
- Gloves, hat, buff — yes, even in summer
- Headlamp — some campsites and refugios have limited lighting
- Copy of your reservations, passport, PDI and park entrance tickets - ideally all printed
Things you might not think of (but will be glad you brought)
- Portable charger — charging is limited
- Extra socks and underwear — nothing beats dry feet after a long day
- Quick-drying towel — useful for showers and rainy days
- Dry bags or plastic bags — to keep clothes and electronics dry
- Cash — for small purchases or emergencies
- Earplugs — useful in dorms or on windy nights
Torres del Paine packing list
Packing for Torres del Paine takes a bit of thought. The weather changes fast, and what you carry depends on where you’re staying and how much you’re willing to carry. To make things easier, we’ve put together a checklist you can download and use while getting ready.
Download Torres del Paine packing list ⬇️
Visas and entry requirements
Whether or not you need a visa for Chile depends on your nationality. A lot of people can enter for up to 90 days without one, but not everyone — and the rules do change.
The best way to find out what applies to you is to check the official immigration website: serviciomigraciones.cl.
If you do need a visa, apply early. Some applications take weeks to process, and if it doesn’t come through in time, you won’t be allowed into the country. And unfortunately, your reservations in Torres del Paine won’t be refunded. This happens more often than you’d think.
You’ll also need to show:
- A valid passport
- Your PDI slip (you’ll get this when you enter Chile)
- Proof of your bookings and park entrance ticket — printed is best
That’s all most people need, but double-check before you go. Better to be sure now than turned around at the border later.
Travel insurance
You’re not required to have travel insurance to visit Torres del Paine, but it’s definitely a good idea. The park is remote, and the bookings, especially for campsites and refugios, are non-refundable after a certain point.
In many cases, the cancellation deadline is up to 90 days before the start of your trek. After that, the providers are not obligated to refund anything, even if your visa is denied, your flight is canceled, or you can’t enter the park because of weather. We receive requests for exceptions almost every week, and unfortunately, they are almost never granted.
Travel insurance is one of the only ways to protect your trip if something unexpected happens.
Look for a policy that covers:
- Trip cancellations or interruptions
- Medical emergencies and evacuation
- Lost or delayed baggage
- Trekking and multi-day hikes in remote areas
Not all basic policies cover this kind of travel, so it’s worth reading the details before you buy.
Read more about cancellation policies ⬇️
Park rules and trail etiquette
Torres del Paine is not only a national park. It's more than that. It’s a fragile ecosystem that’s been damaged in the past by careless visitors. Fires, littering, and going off trail have caused real problems here. The rules aren’t complicated, but they are taken seriously and they exist for good reason.
Here is what know (and what not to do):
- No fires, ever - Fires are strictly forbidden - anywhere, anytime. Use only gas stoves in designated cooking areas.
- Stay on the trail - Going off-trail is dangerous and damages the landscape. Almost all fatal accidents in the park happen outside the marked paths.
- Respect trail closure times - Some trails close at specific times in the afternoon — usually to avoid people hiking in the dark. Always check the official map with the latest closure hours: Torres del Paine official map.
- Camp only at designated sites - Wild camping is not allowed. You must stay in an official campsite or refugio with a confirmed reservation.
- Leave no trace - Carry out all your trash including toilet paper. Use bins at campsites or pack everything with you until you find one.
Useful resources and links
There’s a lot to juggle when planning your trek — maps, transport, bookings, and gear. These are the links and tools we’ve actually found useful, and the ones most people end up using while planning.
Maps and route planning
- CONAF (park authority) - Official source for trail closures, park rules, and seasonal updates.
- TorresHike.com - Check availability and book all your nights - no need to deal with two different companies.
- Mapy.com - Excellent offline map with well-marked trails and campsite locations. Download the Chile map in advance.
- Maps.me - Reliable offline map with excellent trail coverage. Many hikers use it for navigation on the W and O treks. Be sure to download the Chile map before you arrive.
- Gaia GPS - Great if you want elevation profiles, tracking, and more detailed maps.
Transportation links
- Catamaran to Paine Grande - Boat across Lago Pehoé.
- Bus-Sur - Regular buses from Puerto Natales to Park entrances.
Useful apps
- Windy - One of the most reliable weather apps for Patagonia. Shows wind, rain, temperature, and storm systems — all in one place.
- Google translate - Comes in handy if you don’t speak Spanish.
- Rome2Rio - For figuring out how to get from one place to another.
- WhatsApp - Most companies and hostels use this for messages and confirmations.
More information
- How to get to Torres del Paine
- Torres del Paine by car
- How to plan your W Trek
- How to plan your O Trek
- How to book your campsites and refugios
- Torres del Paine food guide
Food and meals in Torres del Paine: What to expect
You don’t need to carry all your food when hiking in Torres del Paine. At almost every overnight stop, you can get a hot meal. Either by booking in advance or buying something on the spot.
The only exception for the 2025/2026 season is Los Perros, where no meals are offered at all.
Pre-booked meals (most common)
Most people pre-order meals when they book their accommodation. You can usually choose:
- Breakfast
- Boxed lunch (to take on the trail)
- Dinner
The food is simple — things like pasta, stew, salad, soup, and bread. Meals are served at set times. It’s not fancy, but it’s filling and reliable after a long day.
If you don’t book ahead
You won’t go hungry. At most locations, there’s either:
- A bar or small restaurant where you can order something hot (pizza, burger, quesadilla)
- A little shop with snacks, instant meals, and basic groceries
Options vary, and the selection is limited, but something is usually available.
Cooking for yourself
If you plan to cook, bring everything you need. Campsites have basic cooking shelters (roof and tables), but:
- No stoves or gear are provided
- Only gas stoves are allowed (no fires)
At most campsites, you can also request hot water — useful if you’re only making tea, soup, or instant meals. Availability can depend on the schedule and staff, but it’s a convenient option if you’re trying to travel light and skip the stove.
Water
- Drinking water is available at all overnight spots
- It usually comes from natural sources and is considered safe
- Some people treat it just in case, but most drink it as-is
If you need to collect water along the trail, you can safely drink from clear streams — as long as you collect it upstream and far away from campsites, refugios, and grazing animals. Avoid still water or anything near signs of contamination.
Read more about food options in Torres del Paine in our detailed guide. ⬇️
Staying connected in the park
Once you're inside Torres del Paine, don’t expect to stay fully connected. There’s no mobile coverage on most trails, and Wi-Fi is only available at a few refugios — usually slow and not free.
If you’re used to being online 24/7, this is your heads-up: you’ll be offline for most of the trek. And that’s part of the point.
Wi-Fi in Torres del Paine
- Some refugios offer paid Wi-Fi
- Speeds are slow, and connections often drop - don’t count on being able to upload photos, make calls, or send large files
- Many people skip it altogether — or just use it to check a quick message
Cell signal in Torres del Paine
- There’s no signal on the trail for most of the W or O trek
- A few spots have very limited reception, mostly near entrances
- Don’t rely on mobile data or calls inside the park
Offline navigation
- Download an offline map before you go (Mapy.com, Maps.me or Gaia GPS work well)
- Take screenshots or save copies of your itinerary, reservations, and trail info
Charging gear
- Charging outlets are available in most refugios, though the number of plugs is limited
- At campsites, it depends — some have outlets in shared areas, others don’t
- Electricity usually only runs during the day — once the generators shut off (often in the evening), there’s no more charging until morning
- Bring a power bank or portable charger so you’re not relying on wall outlets
Final tips before you go
Before you head out, run through the basics one more time. Most problems happen because something small gets missed.
- Check your bookings. Make sure your accommodation, transport, and meals all line up. One missing night can throw off your entire route.
- Print everything. Don’t rely on your phone — batteries die, signals drop. Bring printed copies of your park ticket, reservations, and schedule.
- Pack for real weather. Wind, sun, rain, and snow can all happen on the same day. Bring layers.
- Let someone know you’ll be offline. There’s no cell service on the trail. We often hear from worried relatives — set expectations ahead of time.
- Bring a backup charger. Power outlets aren’t always available, and electricity usually shuts off at night.
Once you’re on the trail, things slow down — in a good way. Just make sure you’ve done the thinking before you get there.
Torres del paine checklist
Need one simple list to keep everything straight? We’ve put together a printable checklist with everything you need to book, pack, and prepare.
Download Torres del Paine checklist ⬇️
Ready to plan your trek?
You’ve done the research. Now all that’s left is to go live it. Start checking availability and secure your dates across both providers — all in one place.